How to test Silverlight 4 Applications using TestComplete 8

TestComplete 8 provides greater support to verify Microsoft Silverlight 4 application components by using any functional test methodology such as black-box and white-box test mechanisms. In this version of test complete engine can access Silverlight internal objects, methods, properties and fields in order to automate applications.


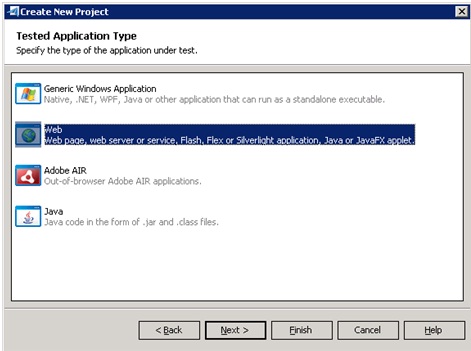
In order to track Silverlight components by testcomplete engine, first you require to check following “Extend Silverlight Object Tree” checkbox option by navigating to Tools -> Default Project Properties -> Projects -> Open Application -> Silverlight. Subsequent that, the test complete engine will have access to Silverlight objects and their methods, properties and fields and you can employ those elements in your automated tests. (Pls. refer the following screen cap)


Further, you can notice all Silverlight objects and their available methods and properties in the hierarchy of object tree model subsequent to explore browsers such as IE, Firefox.


Now TestComplete introduce a new SlObject method in order to automate applications with Silverlight components. Using this method, users allow obtaining a Silverlight component by its name, which was stated in the application’s source code.

Moreover, TestComplete also offers a SlApplication scripting object that is a wrapper to a Silverlight application’s main class that sum up application defined functionality and inherit methods and properties of the System.Windows.Application class.

As well as the members of this System.Windows.Application class contains the SlClasses property. This property assist you for scripting interface to namespaces and assemblies classes included in your Silverlight application package in the.xap file.


Now Testcomplete provide great opportunity to access static non visual objects and their public members by using SlClasses property. In addition to functional testing, this special feature allows you to perform unit/web component performance testing by using application’s internal classes and their associates.

Hope that the above mentioned features will facilitate you easily creates more powerful automated tests for your Silverlight applications.

To download TestComplete 8 Trial

How to create your first Test with TestComplete 8

This article explains how to use testcomplete to record your actions over the application you required to test and replay the reordered actions as your expectation.

Steps:

1. Create New Project Suite by providing project suite name and location.


2. Create new project under above project suite by specifying the name, location and other attribute of a new project and press next button.


3. From this wizard window you allow to specify the type of the application under test. (For this example I opt for web application type).


4. Press Next to move for selecting testing methodology.


5. Now, this wizard window allows you to select the type of your web tests and web application.


6. Test complete allows you to add the tested web pages to your test project if you based on below scripting approach.


7. Now specify scripting language in this wizard window and press Finish button.


8. Now Click “Record New Test” button in order to record test. After this point, every action you perform is being recorded by Testcomplete. E.g. application launch, Every button click, etc.

9. After Recording, you can see all the recorded steps in Test complete workspace – keyword test panel as below “Google search” recording example.


Moreover, now you can notice each action you performed the corresponding screenshot in visualize panel as below.


10. Now, automated test has been created, and you allow running the test by clicking on "Run test" Button.

Now test complete going to drive the system and performed the same sequence of actions that you recorded.

After execution test complete will display test results in test log as follows. This result contains detail information about every action performed during the cause of the run.


To learn quick recording method view below video,